
Project Settings
Each project that you create has a set of options to configure the display and participant engagement.
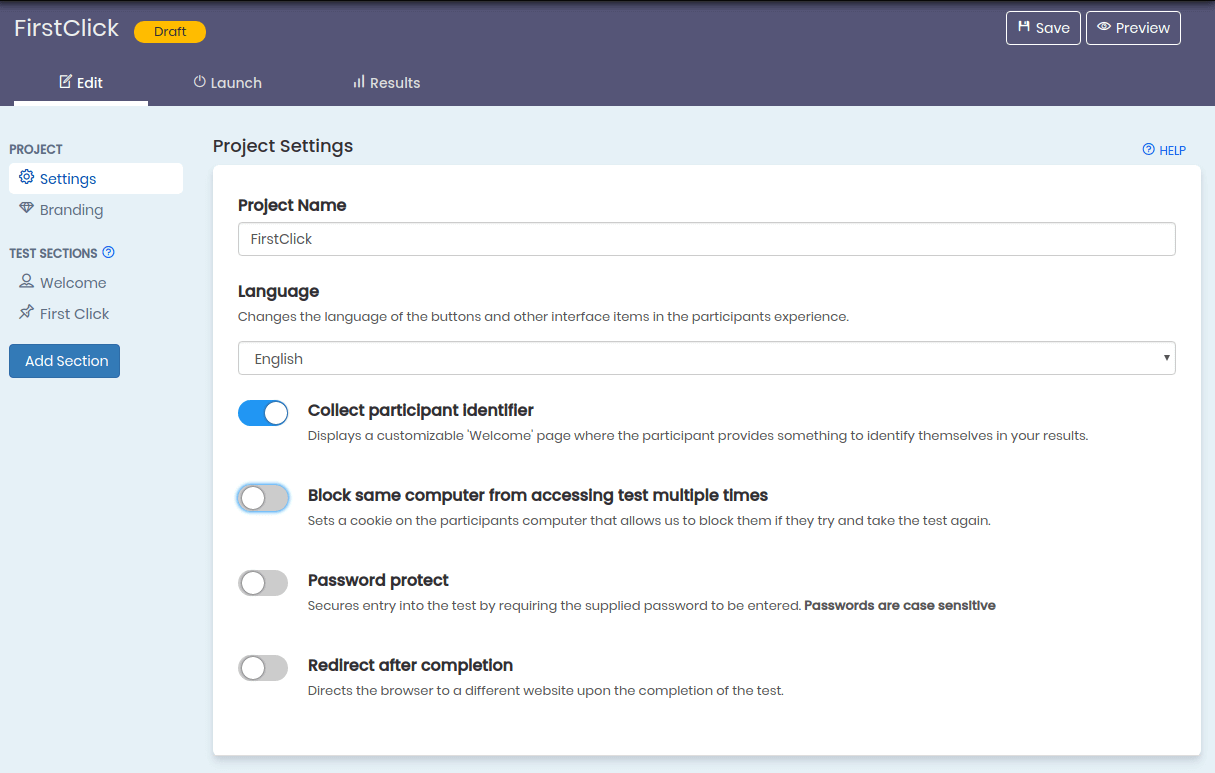
Project Name
The project name is only used as a way to identify one project from another. It is never seen by any participants.
Language
Proven By Users allows you to change the language on the buttons and other interface items in the participants experience. We currently support:
- Arabic
- Chinese (Simplified)
- Danish
- Dutch
- English
- Estonian
- French
- German
- Hindi
- Hungarian
- Italian
- Norwegian
- Portuguese
- Russian
- Spanish
- Swedish
- Turkish
Don't see your language? Let us know and we'll add it!
Collect Participant Identifier
Turning this on, displays a customizable 'Welcome' page where the participant provides something to identify themselves in your results. The welcome page will be the first page the participant sees. See the Welcome Page for more information.
Block same computer from accessing test multiple times
When turned on, this parameter sets a cookie on the participant's computer that allows Proven By Users to detect that they have completed the specific test and block them if they try and take the test again.
Note: We recognize this is not a fool proof solution as users could clear their cookies or use incognito mode to work around the block.
Password Protect
Turning this on allows you to set a password that the participants will have to enter to access the test. Proven By Users does not enforce specific criteria for the password. It is up to you to create a strong password.
Note: The default URL of the test is a randomly generated URL that cannot be easily guessed. Password protection adds an additional layer of security on top of this. Passwords are case sensitive.
Redirect After Completion
Turning this on and supplying a URL will redirect the browser to a different website upon the completion of the test.
If you are working with a recruiting company they may put extra parameters in the URL they send to participants. These extra parameters will be appended to the end of your redirect URL.
Branding Settings
The header on your project can be customized with your company logo and colors. Uploaded logos will be scaled down to fit within the header.
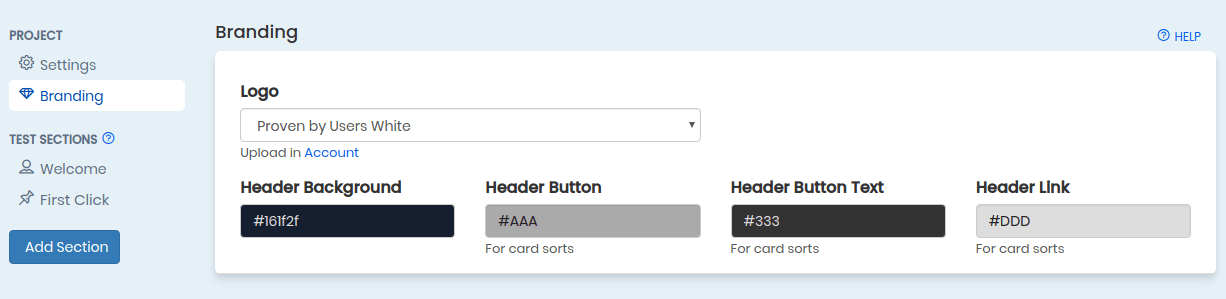
How to put your logo in the header
- After login, use the top navigation to go to the Account tab
- At the bottom of the page upload your logo. Remember that the logo will be scaled down to fit in the header.
- Go to your project and click on the branding section.
- Select the logo you uploaded from the list.
- Preview your project to be sure it looks as expected.